Dears,
I actually do not know the name of this stitch in English as this is common stitch which is part of the world I grew up and learnt it from my mother. This looks like a satin stitch but this is not. In this stitch we hold the long stitch by a shot stitch in the middle, the middle comes very handy when we do large flowers or leaves. For example if you try to fill a big flower with satin stitch, you can't cover the flower with long strains, rather you have to do with short satin stitch. In this this, we can do very long strains without the strains moving after wash. (I will do another example on how to use for long flowers soon)
For now, you can look at this tutorial and enjoy :)
Step 1:
For the bullion rose, please refer my bullion rose tutorial
http://dollylaishram.blogspot.com/2015/03/bullion-rose-tutorial.html

Step 2:
Please follow each pictures properly and I am sure you will get perfectly as this is a very easy stitch

Step 3:
In this step, the needle comes up in the middle on the left hand side of the thread

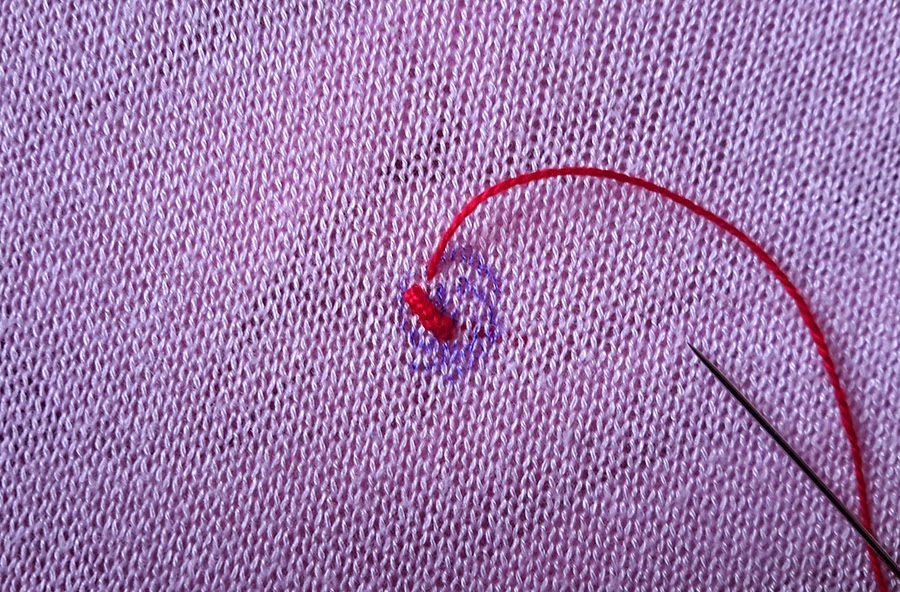
Step 4:
And then insert the needle on the right side of the thread around the middle. Please refer the pic carefully

Step 5:
This shows one complete stitch. Now let's fill the leaf

Step 6:
Repeat the same from the step 3

Step 7 :

Step 8:
One side leaf completed

Step 9:
A full leaf looks like this

Step 10:
The completed motif

I actually do not know the name of this stitch in English as this is common stitch which is part of the world I grew up and learnt it from my mother. This looks like a satin stitch but this is not. In this stitch we hold the long stitch by a shot stitch in the middle, the middle comes very handy when we do large flowers or leaves. For example if you try to fill a big flower with satin stitch, you can't cover the flower with long strains, rather you have to do with short satin stitch. In this this, we can do very long strains without the strains moving after wash. (I will do another example on how to use for long flowers soon)
For now, you can look at this tutorial and enjoy :)
Step 1:
For the bullion rose, please refer my bullion rose tutorial
http://dollylaishram.blogspot.com/2015/03/bullion-rose-tutorial.html

Step 2:
Please follow each pictures properly and I am sure you will get perfectly as this is a very easy stitch

Step 3:
In this step, the needle comes up in the middle on the left hand side of the thread

Step 4:
And then insert the needle on the right side of the thread around the middle. Please refer the pic carefully

Step 5:
This shows one complete stitch. Now let's fill the leaf

Step 6:
Repeat the same from the step 3

Step 7 :

Step 8:
One side leaf completed

Step 9:
A full leaf looks like this

Step 10:
The completed motif