Showing posts with label Embroidery Tutorial. Show all posts

Monday, March 9, 2015

Hand Embroidery Tutorial - Leaf Stitch

Dears,

I actually do not know the name of this stitch in English as this is common stitch which is part of the world I grew up and learnt it from my mother. This looks like a satin stitch but this is not. In this stitch we hold the long stitch by a shot stitch in the middle, the middle comes very handy when we do large flowers or leaves. For example if you try to fill a big flower with satin stitch, you can't cover the flower with long strains, rather you have to do with short satin stitch. In this this, we can do very long strains without the strains moving after wash. (I will do another example on how to use for long flowers soon)
For now, you can look at this tutorial and enjoy :)

Step 1:
For the bullion rose, please refer my bullion rose tutorial
http://dollylaishram.blogspot.com/2015/03/bullion-rose-tutorial.html


Step 2:
Please follow each pictures properly and I am sure you will get perfectly as this is a very easy stitch


Step 3:
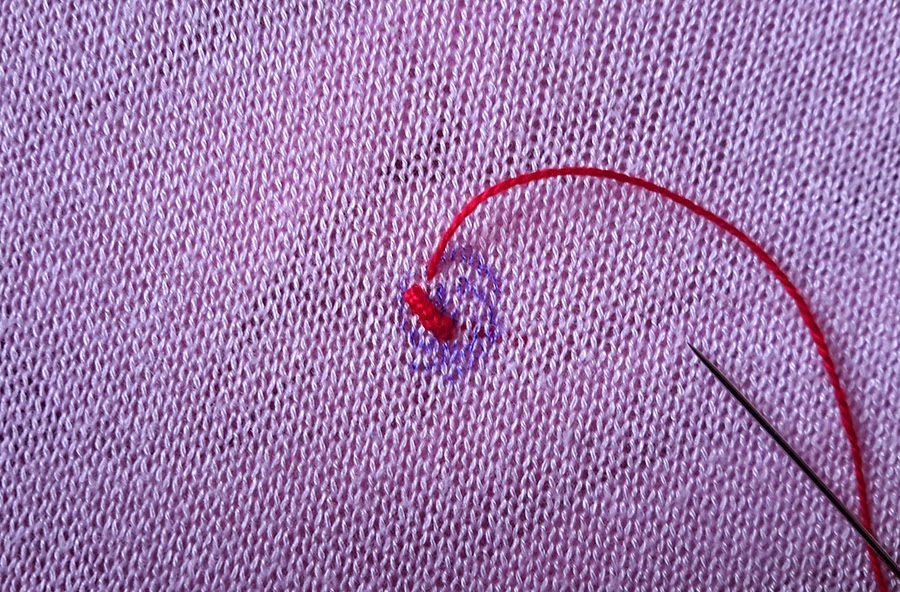
In this step, the needle comes up in the middle on the left hand side of the thread


Step 4:
And then insert the needle on the right side of the thread around the middle. Please refer the pic carefully


Step 5:
This shows one complete stitch. Now let's fill the leaf


Step 6:
Repeat the same from the step 3


Step 7 :


Step 8:
One side leaf completed


Step 9:
A full leaf looks like this


Step 10:
The completed motif

Sunday, March 1, 2015

Bullion rose Tutorial

Spring is the perfect time to start hand embroidery project. If you are new to hand embroidery, I suggest you start with a small project which can be completed in few minutes of sitting.

Today I am sharing hoe to do Bullion rose embroidery, this is a great embroidery which is used widely in Brazilian embroidery.

If you have any trouble understanding the step, please drop a comment and I will write you back

Step 1:
The first and foremost thing is to make short lines like the one in my image below to give you the shape of the rose. As you become experience, you will be able to do it even without making such diagram. However if you want to make similar roses, its always good to make one diagram on a transferable paper which can be reuse


Step 2:
In this step, please see how the threat is wrapped to the needle


Step 3:
In this step, it is important to make the length of the thread wrap a little longer than the line to give u a little curvy shape


Step 4:
Repeat the same from step 1 to step 3 for each line


Step 5:
This is a trick to perform when you do step 3 in order to get the thread coil perfect. Slightly press the threat coil by the left thumb while your right hand pulls the needle though


Step 6:
It is good to start with 2 tiny parallel lines for the rose shape


Step 7:
 Follow the same process for each petal or line


Step 8:
This is how the final rose will look like. Happy stitching...


The next tutorial is the leaf tutorial for this rose. Keep watching this page

Friday, July 1, 2011

French Knot - Hand Embroidery

French knot stitch is also used widely in Indian embroidery. French knot looks very nice with sequin work.
French knot is best suited for the middle part of flowers. However we can always try variations.
I once made a paper weight for mu husband with only french knot and it indeed ca
me out very attractive.
The below tutorial will show how to do a french knot stitch. If you are not able to understand, please leave a comment, I will surely reach out to you with more details:
Step 1:


Step 2:


Step 3:


Step 4:


Step 5:


Step 6:


French Knot:

Pistil Stitch - Hand Embroidery

Pistil stitch is a french knot with an a long tail. It is widely used in Indian Embroidery, mostly while working on flowers.
A step by step tutorial as under:
Step 1:


Step 2:


Step 3:
wrap the threat 2 times around the needle


Step 4:
Hold the threat by your left hand till the entire strand pass through the knot.


Step 5:


Step 6:


Sorry for this image :)
Pistil Stitch Flower:

Herringbone Stitch


Herringbone stitch is a very simple stitch.
When herrigbone stitch is use in a curve design, the re
sult is more attractive than doing it on a parallel line.
The pictures below will describe the sequence step by step to do herring
bone.If anybody needs more details, please writeto me.
Step 1:


Step 2:


Step 3:
Step 4:
Step 5:


Step 6:
Step 7:
Step 8:


Step 9 :
Herringbone:

Saturday, October 2, 2010

Hand Embroidery - Pearl Stitch Tutorial

Pearl Stitch has been always one of my favourite hand embroidery stitch types. I had noticed this stitch when I was a kid on an embroidery, which one of my sister-in- law was working on. I was amazed at the look and feel of the stitch. There was no google when I was growing up :(, so self learning was very difficult. Inspite of trying my hand at this stitch many times, I could never got it right then :). Now as I am all grown up and with the help of google, I have learnt the right way of pearl stitch. A small tutorial for newbies in hand embroidery. Write to me in case if you need more help:


Step 1:


Step 2:


Step 3:
In this step, make sure the needle is pulled under the working thread


Step 4:
And in this step, the working thread should be below the needle when the needle is pulled

Monday, September 20, 2010

Buttonhole Stitch - Tutorial


This is a design I have created only with Buttonhole Stitch for a table cloth. Buttonhole stitch is used for both the leaves and flower.


The images below will display how a buttonhole stitch is done:
Step 1:
Step 2:Step 3:Step 4:
Step 5:
Step 6:Step 7: