Showing posts with label Free Projects. Show all posts

Tuesday, October 4, 2016

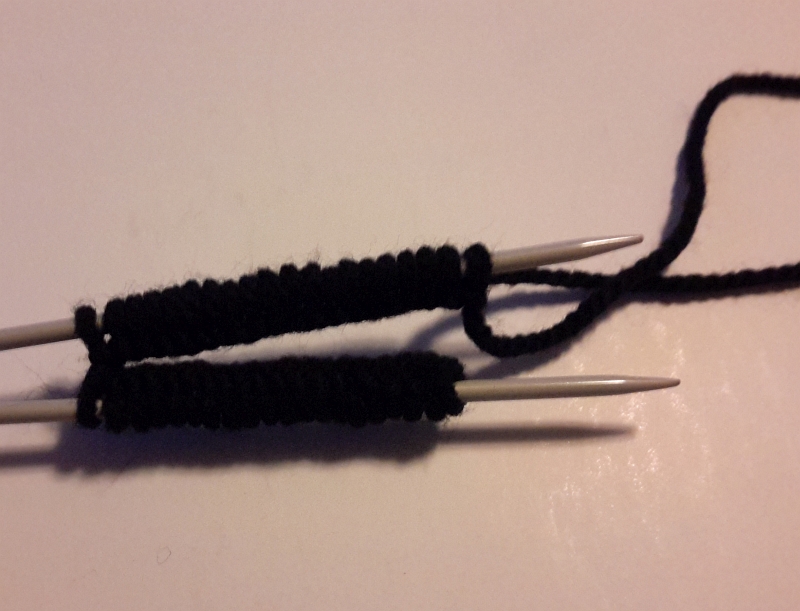
Tubular Bind Off Step by Step Tutorial

Tubular Bind off for 1x1 Rib (K1P1 Rib) is my all time favourite since I started knitting. The first time I saw this bind off was when my mother in law did a finishing for  polo neck sweater, I was so intrigued by the finished, I requested her to teach me. I am thankful to her till date for showing me this awesome bind off

Today, I would like to share it with my friends so that you can also enjoy the amazing finish as much as I do


Thursday, September 22, 2016

Knitted Watermelon

Free Knit Project - Watermelon


Using Judy's Cast on


Red Yarn
1. - Cast on 6 stitches ----------------------------------------------------(6)
2. - (K1, M1) x 6 times --------------------------------------------------(12)
3. - (K2, M1) x 6 times --------------------------------------------------(18)
4. - (K3, M1) x 6 times --------------------------------------------------(24)
5. - (K4, M1) x 6 times --------------------------------------------------(30)
6. - (K5, M1) x 6 times --------------------------------------------------(36)
7. - (K6, M1) x 6 times --------------------------------------------------(42)
8. - (K7, M1) x 6 times --------------------------------------------------(48)
9. - to 12. - Knit all
White Yarn
13. - to 14. - Knit all
Green Yarn
15. - to 16. - Knit all


Now make the back
1. - Start with a Slip Knot
2. - K1,M1 ----------------------------------------------------------------(2)
3. - Purl all
4. - (K1, M1) x 2 times -------------------------------------------------(4)
5. - Purl all
6. - K1, M1, K2, K1, M1-------------------------------------------------(6)
7. - Purl all
8. - K1, M1, K4, K1, M1-------------------------------------------------(8)
9. - Purl all
10. - K1, M1, K6, K1, M1-------------------------------------------------(10)
11. - Purl all
12. - K1, M1, K8, K1, M1-------------------------------------------------(12)
13. - Purl all
14. - K1, M1, K10, K1, M1-------------------------------------------------(14)
15. - Purl all
16. - K1, M1, K4, K1, M1-------------------------------------------------(16)
17. - Purl all
18. - K1, M1, K4, K1, M1-------------------------------------------------(18)
19. - Purl all
20. - K1, M1, K4, K1, M1-------------------------------------------------(20)
21. - Purl all
22. - Knit all
23. - Purl all
24. - SSK, K16, K2tog -------------------------------------------------------(18)
25. - Purl all
26. - SSK, K14, K2tog -------------------------------------------------------(16)
27. - Purl all
28. - SSK, K12, K2tog -------------------------------------------------------(14)
29. - Purl all
30. - SSK, K10, K2tog -------------------------------------------------------(12)
31. - Purl all
32. - SSK, K8, K2tog -------------------------------------------------------(10)
33. - Purl all
34. - SSK, K6, K2tog -------------------------------------------------------(8)
35. - Purl all
36. - SSK, K4, K2tog -------------------------------------------------------(6)
37. - Purl all
38. - SSK, K2, K2tog -------------------------------------------------------(4)
39. - Purl all
40. - SSK, K2tog -------------------------------------------------------(2)
41. - Purl all
42. - K2tog

Stitch the 2 pieces together, fill fiber and add seeds with black thread

Sunday, September 18, 2016

Knitted Strawberry

Free Knit Project - Strawberry


Strawberry brings happiness in my life. This fruit is a sign that summer is around the corner and time to get tan


I use Judy's Cast on for my vegetables


Red Yarn

1. - Cast on 4 stitches --------------------------------------------------(4)
2. - Knit All -------------------------------------------------------------(4)
3. - (K1, M1) x 4 times ------------------------------------------------(8)
4. - (K2, M1) x 4 times ------------------------------------------------(12)
5. - (K3, M1) x 4 times ------------------------------------------------(16)
6. - Knit all
7. - (K4, M1) x 4 times ------------------------------------------------(20)
8. - Knit all
9. - (K5, M1) x 4 times ------------------------------------------------(24)
10. - Knit all
11. - (K6, M1) x 4 times ------------------------------------------------(28)
12. - Knit all
13. - (K7, M1) x 4 times ------------------------------------------------(32)
14. - Knit all
15. - (K8, M1) x 4 times ------------------------------------------------(36)
16. -  to 20.- Knit all
21. - (K4, K2tog) x 6 times ------------------------------------------------(30)
22. - (K3, K2tog) x 6 times ------------------------------------------------(24)
23. - (K2, K2tog) x 6 times ------------------------------------------------(18)
24. - (K1, K2tog) x 6 times ------------------------------------------------(12)
25. - (K2tog) x 6 times ------------------------------------------------(6)

Green Yarn
26. - (K1, K2tog) x 2 times ------------------------------------------------(4)
27. - to 29. - Knit all
Sew ends

Leaf (Make 3)
Green Yarn

1. - Cast on 3 stitches (long tail stitch) -----------------------------------(3)
2. - K1, M1, K1, M1, K1 ---------------------------------------------------(5)
3. - Purl all
4. - K2, M1, K1, M1, K2 ---------------------------------------------------(7)
5. - Purl all
6. - SSk, K3, K2tog ---------------------------------------------------------(5)
7. - P2tog, P1, P2tog --------------------------------------------------------(3)
8. - Slip 1, K2tog, PSSO


Saturday, September 17, 2016

Knitted Chilly

Free Knit Project - Chilly


The Veggie craze continues :)


Red Yarn
1. - Start with a slip knot
2. - M1, K1 - Like I-cord knitting
3. - M1, K2 - Like I-cord knitting
4. - M1, K3  - Like I-cord knitting
5. - M1, K4   - Like I-cord knitting
6. - M1, K6  - Like I-cord knitting
Divide the stitches to start knitting in circle
7. - Knit all
8. - (K1, M1, K2) x 2 times ----------------------(8)
9. - Knit all
10. - Knit all
11. - (K2, M1, K2) x 2 times ---------------------(10)
12. - Knit all
13. - Knit all
14. - (M1, K5) x 2 times ---------------------------(12)
15. - Knit all
16. - Knit all
17. - Knit all
18. - (K1, M1, K5) x 2 times ----------------------(14)
19. - to 30. - Knit all
31. - K2tog x 7 times --------------------------------(7)
Sew ends

Green Yarn
wrap yarns to make the stalk and embroider to the red chilly 

Wednesday, September 14, 2016

Knitted Squash

Free Knit Project - Squash


The Squash is knitted from bottom to top


Green Yarn
1. - Make a slip knot and this will be the first stitch ---------------------------------------------------(1)
2. - M1, K1, --------------------------------------------------------------------------------------------------(2)
3. - K1, M1, K1 ---------work like I-cord knitting ------------------------------------------------------(3)
4. - (K1, M1) x 3 times -----------work like I-cord knitting --------------------------------------------(6)
Divide these 6 stitches in circular needle/ DPNs to start knitting in round
5. - Knit all --------------------------------------------(6)
6. - (K1, M1) x 6 times --------------------------------------------(12)
7. - Knit all --------------------------------------------(12)
8. - (K2, M1) x 6 times --------------------------------------------(18)
9. - Knit all --------------------------------------------(18)
10. - (K3, M1) x 6 times --------------------------------------------(24)
11. - Knit all --------------------------------------------(24)
12. - (K4, M1) x 6 times --------------------------------------------(30)
13. - Knit all --------------------------------------------(30)
14. - (K5, M1) x 6 times --------------------------------------------(36)
15. - Knit all --------------------------------------------(36)
16. - Knit all --------------------------------------------(36)
17. - Knit all --------------------------------------------(36)

Yellow Yarn
18. - Knit all --------------------------------------------(36)
19. - Knit all --------------------------------------------(36)
20. - (K4, K2tog) x 6 times --------------------------------------------(30)
21. - K1, (K5, K2tog) x 4 times, K1 ----------------------------------(26)
22. - K1, (K4, K2tog) x 4 times, K1 ----------------------------------(22)
23. - K1, (K3, K2tog) x 4 times, K1 ----------------------------------(18)
24. - (K1, K2tog) x 6 times ----------------------------------(12)
25. - (K2, K2tog, K2) x 2 times -----------------------------(10)
26. - to 38. -  Knit all --------------------------------------------(10)
39. - (K1, K2tog, K2tog) x 2 times ----------------------------(6)

Green Yarn - this will make the stalk
40. - Knit all
41. - Knit all
42. - Knit all
43. - Knit all

Sew ends

I used a darker green yarn and used leaf stitch to make the color variations

Tuesday, September 13, 2016

Knitted Eggplant

Free Knit Pattern - Eggplant


So, my days are filled with vegetables and I adore these cute little veggies. They are so easy and fun to make :)


I use Judy's cast on for this project as this eggplant is knitted from bottom to top

With Purple Yarn
1. - Cast on 10 stitches
2. - (K1, M1) x 10 times --------------------------------------------------(20)
3. - (K2, M1) x 10 times --------------------------------------------------(30)
4. - (K3, M1) x 10 times --------------------------------------------------(40)
5. - (K4, M1) x 10 times --------------------------------------------------(50)
6. - to 19. - Knit all  --------------------------------------------------------(50)
20. - K1, (K6, K2tog) 6 times, K1 ---------------------------------------(44)
21. - Knit all
22. - K1, (K5, K2tog) 6 times, K1 ---------------------------------------(38)
23. - Knit all
24. - K1, (K4, K2tog) 6 times, K1 ---------------------------------------(32)
25. - to 30. - Knit all
31. - K1, (K3, K2tog) 6 times, K1 ---------------------------------------(26)
32. - to 34. - Knit all
35. - K1, (K2, K2tog) 6 times, K1 ---------------------------------------(20)
36. - to 38. - Knit all
39. - K2tog x 10 times -----------------------------------------------------(10)
Sew the end

For the head - we will make 3 leaves, 1 leaf with a stalk and 2 without the stalk

Leaf with stalk:
1. - Cast on 3 stitches. We will work like I - cord knitting for the next 4 rows
2. - Knit all ---------------------(3)
3. - Knit all ---------------------(3)
4. - Knit all ---------------------(3)
5. - Knit all ---------------------(3)
6. - Purl all ---------------------(3)
7. - K1, YO, K1, YO, K1  ---------------------(5)
8. - Purl all
9. -  K2, YO, K1, YO, K2  ---------------------(7)
10. Purl all
11. - SSK, K3, K2tog  ---------------------(5)
12. - Purl all
13. - SSK, K1, K2tog  ---------------------(3)
14. - Slip 1, K2tog, PSSO--------------------(1)
Sew end

Leaf without stalk:
1. - Cast on 3 stitches--------------------(3)
2. - Purl all ---------------------(3)
3. - K1, YO, K1, YO, K1  ---------------------(5)
4. - Purl all
5. -  K2, YO, K1, YO, K2  ---------------------(7)
6. Purl all
7. - SSK, K3, K2tog  ---------------------(5)
8. - Purl all
9. - SSK, K1, K2tog  ---------------------(3)
10. - Slip 1, K2tog, PSSO--------------------(1)
Sew end

Monday, September 12, 2016

Knit Pumpkin

Free Knit Project - Pumpkin


Using Judy's cast on style, cast on 6 stitches
1. - Knit all    ------------------------------------ (6)
2. - (K1, M1) x 6 times ------------------------ (12)
3. - (K2, M1) x 6 times ------------------------ (18)
4. - (K3, M1) x 6 times ------------------------ (24)
5. - (K4, M1) x 6 times ------------------------ (30)
6. - (K5, M1) x 6 times ------------------------ (36)
7. - (K6, M1) x 6 times ------------------------ (42)
8. - (K7, M1) x 6 times ------------------------ (48)
9. - Knit all
10. - Knit all
11. - Knit all
12. - Knit all
13. - Knit all
14. - Knit all
15. - Knit all
16. - Knit all
17. - (K6, K2tog) x 6 times ------------------- (42)
18. - (K5, K2tog) x 6 times ------------------- (36)
19. - (K4, K2tog) x 6 times ------------------- (30)
20. - (K3, K2tog) x 6 times ------------------- (24)
21. - (K2, K2tog) x 6 times ------------------- (18)
22. - (K1, K2tog) x 6 times ------------------- (12)
23. - (K2tog) x 6 times ------------------- (6)

Stuff the pumpkin and sew the end. Wrap the pumpkin with the same thread to give the look


Saturday, September 10, 2016

Knitted Owl

Free Knit Project - Owl


Owl fascinates me in any form and here is one of my creation :) Hope my friends can create and replicate my pattern


I use Judy's Cast on style for this and the knitting starts from the bottom
A - Purple Yarn
B - Black Yarn

With A
1. -  Cast on 6 stitches
2. -  (K1, M1) x 6 times ------------------------------------------------(12)
3. -  (K2, M1) x 6 times ------------------------------------------------(18)
4. -  (K2, M1) x 8 times, K2 -------------------------------------------(26)
5. -  (K3, M1) x 8 times, K2 -------------------------------------------(34)
6. -  (K4, M1) x 8 times, K2 -------------------------------------------(42)
7. -  Knit all---------------------------------------------------------------(42)
8. -  Knit all---------------------------------------------------------------(42)
9. -  Knit all---------------------------------------------------------------(42)
10. - Knit all--------------------------------------------------------------(42)
11. - Knit all--------------------------------------------------------------(42)
12. - Knit all--------------------------------------------------------------(42)
13. - K3 (A), K1 (B), K1 (A), K1 (B), K2 (A), K1 (B), K3 (A), K1 (B), K2 (A), K1 (B), K1 (A), K1 (B), K3 (A)-------------------------------------------------------(42)
14. - Knit all-------------------------------------------------------------(42)
15. - K2 (A), {K1 -(B), K1 (A)} x 9 times--------------------------(42)
16. - Knit all-------------------------------------------------------------(42)
17.- K3 (A), K1 (B), K1 (A), K1 (B), K2 (A), K1 (B), K3 (A), K1 (B), K2 (A), K1 (B), K1 (A), K1 (B), K3 (A)-------------------------------------------------------(42)
18. - Knit all-------------------------------------------------------------(42)
19. - K2 (A), {K1 -(B), K1 (A)} x 9 times--------------------------(42)
20. - Knit all-------------------------------------------------------------(42)
21.- K3 (A), K1 (B), K1 (A), K1 (B), K2 (A), K1 (B), K3 (A), K1 (B), K2 (A), K1 (B), K1 (A), K1 (B), K3 (A)-------------------------------------------------------(42)
22. - Knit all-------------------------------------------------------------(42)
23. - K2 (A), {K1 -(B), K1 (A)} x 9 times--------------------------(42)
24. - Knit all-------------------------------------------------------------(42)
25.- K3 (A), K1 (B), K1 (A), K1 (B), K2 (A), K1 (B), K3 (A), K1 (B), K2 (A), K1 (B), K1 (A), K1 (B), K3 (A)-------------------------------------------------------(42)
26. - Knit all-------------------------------------------------------------(42)
27. - Knit all-------------------------------------------------------------(42)
28. - Knit all-------------------------------------------------------------(42)
29. - Knit all-------------------------------------------------------------(42)
30. - Knit all-------------------------------------------------------------(42)
31. - Knit all-------------------------------------------------------------(42)
32. - Knit all-------------------------------------------------------------(42)
33. - (K3, K2tog) x 8 times, K2---------------------------------------(34)
34. - (K3, K2tog) x 6 times, (K2, K2tog)----------------------------(34)

From here, we will have to make the ears
Continue from the body (right ear)
35. - Knit 4 stitches, Slip the next 19 stitches in wasted yarn, Cast on 2 stitches, Knit 4 stitches ---(10)
36. - Knit all -----------------(10)
37. - (SSK, K1, K2tog) x 2 times ---------------(6)
38. - Knit all ----------------------------------------(6)
39. - SSk, K2tog, SSK ----------------------------(3)
Sew the ends

Left Ear: (Hold 11 stitches in the middle - 6 stitches in front and 5 stitches in back in wasted yarn)
40. - K8, Cast on 2 stitches-----------------(10)
41. - Knit all-----------------(10)
42. - (SSK, K1, K2tog) x 2 times ---------------(6)
43. - Knit all ----------------------------------------(6)
44. - SSk, K2tog, SSK ----------------------------(3)
Sew the ends


Sew the 11 stitches from the wasted yarn using Kitchener stitch, if required pick stitches and sew the corners

For the eyes, I use white and black yarn and embroider using chain stitch


Monday, September 5, 2016

Knitted Perfect Circle - Christmas Ornament

Free Crochet Project - Christmas Ornament


I wanted to try crochet and knit the same pattern and check the outcome. To start with, I did this simple Christmas ornament. They look very identical and almost equally beautiful. However, I will still prefer the crochet one over the knit one due to the finished look


Knit  Pattern
RED YARN
Step - 1 - Magic circle, cast on 6 stitches--------------------------------------------------------------------- (6)
Step - 2 - (K1M1) X 6 times --------------------------------------------------- (12)
Step - 3 - (K2, M1) X 6 times ---------------------------------------------(18)
Step - 4 - K2, M1, K3, M1, K4, M1, K3, M1, K4, M1, K2-----(23)
Step - 5 - K2, M1, K4, M1, K4, M1, K4, M1, K4, M1, K4, M1, K1 -----(29)
Step - 6 - K5, M1K6, M1K7, M1K6, M1K5, M1--------------(34)
Step - 7 - K5, M1K7, M1, K5,  M1K7,  M1K5,  M1K2-----(39)
Step - 8 - K6, M1K8, M1K9, M1K9, M1K3--------------(43)
Step - 9 - M1K10, M1K10, M1K10, M1K9---------------------(47)
Step - 10 - K7, M1K14, M1K14, M1K9---------------------(50)
Step - 11 - K5,M1K16, M1K16, M1K10--------------------(53)
Step - 12 - K9, M1K14, M1, K15M1K12--------------------(56)


WHITE YARN
Step - 13 -  K15, M1 K24, M1K15---------------------(58)
Step - 14 -  K20,M1K37---------------------(59)

RED YARN
Step - 15 - Knit all---------------------(59)
Step - 16 - Knit all---------------------(59)

WHITE YARN
Step - 17 - Knit all--------------------(59)
Step - 18 - K37, K2tog, K37--------------------(58)

RED YARN
Step - 19 - K15, K2tog K24, K2tog, K15---------------------(56)
Step - 20 - K9, K2togK14, K2tog, K15, K2togK12---------------------(53)
Step - 21 - K5, K2tog, K16, K2togK16, K2togK10---------------------(50)
Step - 22 - K7, K2togK14, K2togK14, K2togK9---------------------(47)
Step - 23 - K2togK10, K2togK10, K2togK10, K2togK9,------------(43)
Step - 24 - K6, K2togK8, K2togK9, K2togK9, K2togK3----(39)
Step - 25 - K4st, K2togK6, K2togK5, K2togK7, K2togK5, K2togK2-----(34)
Step - 26 - K4, K2togK5, K2togK6, K2tog, K5, K2togK4, K2tog--------------(29)
Step - 27 - K1, K2tog, K3, K2tog, K3, K2tog, K3, K2tog, K3, K2tog, K3, K2tog, K1 -----(23)
Step - 28 - K1, K2tog, K2, K2tog, K3, K2tog, K2, K2tog, K3, K2tog, K2-----(18)
Step - 29 - (K2togK1 )x 6 times--------------------(12)
Step - 30 - K2tog x 6 times
Sew ends

M1 - make one by knitting front and then back
K - Knit
K2tog - Knit 2 stitches together

Saturday, September 3, 2016

Perfect Round Christmas Ornament - Amigurumi

Free Crochet Project - Christmas Ornament

I wanted to try crochet and knit the same pattern and check the outcome. To start with, I did this simple Christmas ornament. They look very identical and almost equally beautiful. However, I will still prefer the crochet one over the knit one due to the finished look


Crochet Pattern
RED YARN
Step - 1 - Magic circle ---------------------------------------------------------------------- (6)
Step - 2 - Work 2 Sc in each st around --------------------------------------------------- (12)
Step - 3 - (Sc, 2Sc) X 6 times ---------------------------------------------(18)
Step - 4 - Sc, 2Sc, Sc in 2st, 2Sc, Sc in 3st, 2Sc, Sc in 2st, 2Sc, Sc in 3st, 2Sc, Sc in 2st-----(23)
Step - 5 - Sc, 2Sc, Sc in 3st, 2Sc, Sc in 3st, 2Sc, Sc in 3st, 2Sc, Sc in 3st, 2Sc,  Sc in 3st, 2Sc, Sc -----(29)
Step - 6 - Sc in 4st, 2Sc, Sc in 5st, 2Sc, Sc in 6st, 2Sc, Sc in 5st, 2Sc, Sc in 4st, 2Sc--------------(34)
Step - 7 - Sc in 4st, 2Sc, Sc in 6st, 2Sc, Sc in 5st, 2Sc, Sc in 7st, 2Sc, Sc in 5st, 2Sc, Sc in 2st-----(39)
Step - 8 - Sc in 6st, 2Sc, Sc in 8st, 2Sc, Sc in 9st, 2Sc, Sc in 9st, 2Sc, Sc in 3st--------------(43)
Step - 9 - 2Sc, Sc in 10st, 2Sc, Sc in 10st, 2Sc, Sc in 10st, 2Sc, Sc in 9st,---------------------(47)
Step - 10 - Sc in 7st, 2Sc, Sc in 14st, 2Sc, Sc in 14st, 2Sc, Sc in 9st---------------------(50)
Step - 11 - Sc in 5st, 2Sc, Sc in 16st, 2Sc, Sc in 16st, 2Sc, Sc in 10st---------------------(53)
Step - 12 - Sc in 9st, 2Sc, Sc in 14st, 2Sc, Sc in 15st, 2Sc, Sc in 12st---------------------(56)


WHITE YARN
Step - 13 -  Sc in 15st, 2Sc,  Sc in 24st, 2Sc, Sc in 15st---------------------(58)
Step - 14 -  Sc in 20st, 2Sc, Sc in 37st---------------------(59)

RED YARN
Step - 15 - Sc in all st---------------------(59)
Step - 16 - Sc in all st---------------------(59)

WHITE YARN
Step - 17 - Sc in all st---------------------(59)
Step - 18 - Sc in 37st, Sc2tog, Sc in 37st---------------------(58)

RED YARN
Step - 19 - Sc in 15st, Sc2tog Sc in 24st, Sc2togSc in 15st---------------------(56)
Step - 20 - Sc in 9st, Sc2togSc in 14st, Sc2togSc in 15st, Sc2togSc in 12st---------------------(53)
Step - 21 - Sc in 5st, Sc2togSc in 16st, Sc2togSc in 16st, Sc2togSc in 10st---------------------(50)
Step - 22 - Sc in 7st, Sc2togSc in 14st, Sc2togSc in 14st, Sc2togSc in 9st---------------------(47)
Step - 23 - Sc2togSc in 10st, Sc2togSc in 10st, Sc2togSc in 10st, Sc2togSc in 9st,------------(43)
Step - 24 - Sc in 6st, Sc2togSc in 8st, Sc2togSc in 9st, Sc2togSc in 9st, Sc2togSc in 3st----(39)
Step - 25 - Sc in 4st, Sc2togSc in 6st, Sc2togSc in 5st, Sc2togSc in 7st, Sc2togSc in 5st, Sc2togSc in 2st-----(34)
Step - 26 - Sc in 4st, Sc2togSc in 5st, Sc2togSc in 6st, Sc2togSc in 5st, Sc2togSc in 4st, Sc2tog--------------(29)
Step - 27 - Sc, Sc2tog, Sc in 3st, Sc2tog, Sc in 3st, Sc2tog, Sc in 3st, Sc2tog, Sc in 3st, Sc2tog,  Sc in 3st, Sc2tog, Sc -----(23)
Step - 28 - Sc, Sc2tog, Sc in 2st, Sc2tog, Sc in 3st, Sc2tog, Sc in 2st, Sc2tog, Sc in 3st, Sc2tog, Sc in 2st-----(18)
Step - 29 - (Sc2tog, Sc in 1st )x 6 times--------------------(12)
Step - 30 - Sc2tog x 6 times
Sew ends


Sc - Single Crochet
2Sc - Single Crochet twice - this means to increase one Sc
St - Stitch
Sc2tog - 2 single crochet together - this means one decrease


Friday, June 10, 2016

Ankle length Toe Up socks

Free Pattern - Sock Knitting - Ankle length Toe-up Sock

I wanted a easy knit and also try knitting 2 socks at the time. So, I set out the journey with this beautiful pair of socks. And hurrah! I made and love the soft feeling

Initially I was worried as this is the first time I use 3ply wool for socks and on top of that I use a larger needle. Surprisingly the final product is just too good. Looks awesome even without blocking

I started with 3.5mm needle and for the cuffs, I used 3mm needle

This is for intermidiate level knitting


1. - Using provisional cast on. Cast on 26 stitches
2. - Purl all
3. - Knit all till the last stitch, wrap the last stitch and turn (feel free to watch a youtube video to see how the wrap is done as it is difficult to explain by writing)
4. - Purl all till the last stitch, wrap the last stitch and turn
5. - Slip the first stitch, and knit all the stitches till the 2nd stitch from the end, wrap that 2nd stitch and turn
6. - Slip the first stitch, and purl all the stitches till the 2nd stitch from the end, wrap that 2nd stitch and turn
7. - Slip the first 2 stitches, and knit all the stitches till the 3rd stitch from the end, wrap that 3rd stitch and turn
8. - Slip the first 2 stitches, and purl all the stitches till the 3rd stitch from the end, wrap that 3rd stitch and turn
9. - Slip the first 3 stitches, and knit all the stitches till the 4th stitch from the end, wrap that 4th stitch and turn
10. - Slip the first 3 stitches, and purl all the stitches till the 4th stitch from the end, wrap that 4th stitch and turn
11. - Slip the first 4 stitches, and knit all the stitches till the 5th stitch from the end, wrap that 5th stitch and turn
12. - Slip the first 4 stitches, and purl all the stitches till the 5th stitch from the end, wrap that 5th stitch and turn
13. - Slip the first 5 stitches, and knit all the stitches till the 6th stitch from the end, wrap that 6th stitch and turn
14. - Slip the first 5 stitches, and purl all the stitches till the 6th stitch from the end, wrap that 6th stitch and turn
15. - Slip the first 6 stitches, and knit all the stitches till the 7th stitch from the end, wrap that 7th stitch and turn
16. - Slip the first 6 stitches, and purl all the stitches till the 7th stitch from the end, wrap that 7th stitch and turn
17. - Slip the first 7 stitches, and knit all the stitches till the 8th stitch from the end, wrap that 8th stitch and turn
18. - Slip the first 7 stitches, and Purl all the stitches till the 8th stitch from the end, wrap that 8th stitch and turn

Now we have to pick up the wraps

19. -  Slip the first 8 stitches, then knit till the first wrap stitch (8th stitch from the end), pick up the wrap and K2tog, Wrap the next stitch (7th stitch from the end ) and turn
20. -  Slip the first 8 stitches, then purl till the first wrap stitch (8th stitch from the end), pick up the wrap (pick it from the right side of the work) and P2tog, Wrap the next stitch (7th stitch from the end ) and turn
21. -  Slip the first 7 stitches, then knit till the first wrap stitch (7th stitch from the end), pick up the wrap and K2tog, Wrap the next stitch (6th stitch from the end ) and turn
22. -  Slip the first 7 stitches, then purl till the first wrap stitch (7th stitch from the end), pick up the wrap (pick it from the right side of the work) and P2tog, Wrap the next stitch (6th stitch from the end ) and turn
23. -  Slip the first 6 stitches, then knit till the first wrap stitch (6th stitch from the end), pick up the wrap and K2tog, Wrap the next stitch (5th stitch from the end ) and turn
24. -  Slip the first 6 stitches, then purl till the first wrap stitch (6th stitch from the end), pick up the wrap (pick it from the right side of the work) and P2tog, Wrap the next stitch (5th stitch from the end ) and turn
25. -  Slip the first 5 stitches, then knit till the first wrap stitch (5th stitch from the end), pick up the wrap and K2tog, Wrap the next stitch (4th stitch from the end ) and turn
26. -  Slip the first 5 stitches, then purl till the first wrap stitch (5th stitch from the end), pick up the wrap (pick it from the right side of the work) and P2tog, Wrap the next stitch (4th stitch from the end ) and turn
27. -  Slip the first 4 stitches, then knit till the first wrap stitch (4th stitch from the end), pick up the wrap and K2tog, Wrap the next stitch (3rd stitch from the end ) and turn
28. -  Slip the first 4 stitches, then purl till the first wrap stitch (4th stitch from the end), pick up the wrap (pick it from the right side of the work) and P2tog, Wrap the next stitch (3rd stitch from the end ) and turn
29. -  Slip the first 3 stitches, then knit till the first wrap stitch (3rd stitch from the end), pick up the wrap and K2tog, Wrap the next stitch (2nd stitch from the end ) and turn
30. -  Slip the first 3 stitches, then purl till the first wrap stitch (3rd stitch from the end), pick up the wrap (pick it from the right side of the work) and P2tog, Wrap the next stitch (2nd stitch from the end ) and turn
31. -  Slip the first 2 stitches, then knit till the first wrap stitch (2nd stitch from the end), pick up the wrap and K2tog, Wrap the next stitch (Last stitch ) and turn
32. -  Slip the first 2 stitches, then purl till the first wrap stitch (2nd stitch from the end), pick up the wrap (pick it from the right side of the work) and P2tog, Wrap the next stitch (Last stitch ) and turn
33. -  Slip the first 1 stitch, then knit till the last stitch,  pick up the wrap and K2tog and turn
34. -  Slip the first 1 stitch, then purl till the last stitch, pick up the wrap and P2tog and turn


Pick up another 26 stitchs from the provisional cast on to make the magic circle

35. - Knit all round .....................................................(52)
We will follow the colorwork pattern below for the next rounds and then we will do the Heels


Now, its time for the Heels
At this point, we will work only on one side of the sock, that is only on 26 stitches
For the heals, we will just have to reapeat from row 3 to row 34

After we complete the heels,
- We will 9 rounds of all Knit
- 14 rounds of K1P1 rib

I used tubular bind off as I like the look and it is quite strechy too

Please feel free to drop a comment if you find any mistake in the pattern or need any help


Tuesday, June 7, 2016

Heart Motif Toe Up Socks

Free Pattern - Sock Knitting - Toe-up Sock

Needle - 3mm
Yarn - 4 ply
Fits - US size 8-9

1. - Using Judy's cast on, cast on 28 stitches (14 above and 14 below) - There are lots of videos in Youtube, refer them to help you understand ....................................(28)
2. - Knit all.........................................................................................(28)
3. - M1, K14, M1, M1, K14,M1 ........................................................(32)
4. - Knit all
5. - M1, K16, M1, M1, K16,M1 ........................................................(36)
6. - Knit all
7. - Knit all
8. - M1, K18, M1, M1, K18,M1 ........................................................(40)
9. - Knit all
10. - Knit all
11. - M1, K20, M1, M1, K20,M1 ........................................................(44)
12. - Knit all
13. - Knit all
14. - M1, K22, M1, M1, K22,M1 ........................................................(48)
15. - Knit all
15. - Knit all
16. - Now we need the chart below

17. - Knit all
18. - Knit all
19. - Repeat the chart above
20. - Knit all
21. - Knit all
22. - Knit all
23. - Knit all
24. - Knit all
25. - Knit all

Now the HEEL part: I use the short rows for the heels, refere youtube video for that
1. Now we will work only one one side ...........................................(24)
2. Knit all till the last stitch, wrap the stitch and turn
3. Slip 1, purl till the last stitch , wrap the last stitch and turn
4. we will continue this pattern of wrapping and turning till we wrap the 6th stitch - so on both sides, you should have 6 stitches wrap
5. Now its time to pick up those wraps, Knit till the first wrap (6th wrap stitch), pick up the wrap, k2tog, wrap the next stitch and turn (so we have wrap the 5th stitch twice now)
6. Purl till the 6th wrap stitch, pick up wrap (pick up from the right side), p2tog, wrap the next stitch and turn
7. continue this till you pick and knit all the wraps you did

We will continue now knitting for the ankle
1, Knit all ..........................................................................(48)
2. to 33 rounds - K2P2 rib
Bind off


Saturday, May 14, 2016

Knitted Bunny - Amigurumi - Free Pattern

Free Pattern - Amigurumi - Knitted Toy

Magic loop knitting with circular needle
Body ( 1 piece )
With Yellow Yarn
1. cast on 6 stitchs - long tail cast one ..............................................(6)
2. (K1, M1) x 6 times........................................................................(12)
3. (K2, M1) x 6 times........................................................................(18)
4. (K3, M1) x 6 times........................................................................(24)
5. (K4, M1) x 6 times........................................................................(30)
6. (K5, M1) x 6 times........................................................................(36)
7. (K6, M1) x 6 times........................................................................(42)
8. (K7, M1) x 6 times........................................................................(48)
9. (K8, M1) x 6 times........................................................................(54)
10. (K9, M1) x 6 times......................................................................(60)
11. to 15. Knit all ..............................................................................(60)
16. K24, K2tog, K9, K2tog, K23.......................................................(58)
17. to 18. Knit all ...............................................................................(58)
19. K24, K2tog, K8, K2tog, K22.......................................................(56)
20. to 21. Knit all ...............................................................................(56)
22. k2tog, knit 17, k2tog, knit 7, k2tog, Knit 7, k2tog, knit 17..........(52)
23. k2tog, K16, k2tog, Knit 6, K2tog, Knit 6, k2tog, K16.................(48)
24. (k2tog, K6) x 6 times ...................................................................(42)
25. (k2tog, K5) x 6 times ...................................................................(36)
26. (k2tog, K4) x 6 times ...................................................................(30)
27. (k2tog, K3) x 6 times ...................................................................(24)
28. (k2tog, K2) x 6 times ...................................................................(18)
29. Knit all ..........................................................................................(18)
30. (K3, M1) x 6 times........................................................................(24)
31. (K4, M1) x 6 times........................................................................(30)
with blue yarn
32. (K5, M1) x 6 times........................................................................(36)
33. (K6, M1) x 6 times........................................................................(42)
34. to 37. Knit all ................................................................................(42)
38. (K5, k2tog) x 6 times ...................................................................(36)
39. Knit all ..........................................................................................(36)
40. (K4, k2tog) x 6 times ...................................................................(30)
41. Knit all .........................................................................................(30)
42. (K3, k2tog) x 6 times ...................................................................(24)
43. Knit all ..........................................................................................(24)
44. (K2, k2tog) x 6 times ...................................................................(18)
45. (K1, k2tog) x 6 times ...................................................................(12)
46. k2tog x 6 times
Transfer the 6 stitches in a tapestry needle and sew

CAP :
With blue yarn
1. cast on 6 stitchs - long tail cast one ..............................................(6)
2. (K1, M1) x 6 times........................................................................(12)
3. (K2, M1) x 6 times........................................................................(18)
4. (K3, M1) x 6 times........................................................................(24)
5. (K4, M1) x 6 times........................................................................(30)
6. (K5, M1) x 6 times........................................................................(36)
7. (K6, M1) x 6 times........................................................................(42)
8. (K7, M1) x 6 times........................................................................(48)
9. (K8, M1) x 6 times........................................................................(54)
10. (K9, M1) x 6 times......................................................................(60)
11. to 19. Knit all ..............................................................................(60)
BO

Arms (Make 2)
With Blue Yarn
At the side, pick up 6 stitches (3 above and 3 below to make a circle)
1. Knit all .........................................................................................(6)
2. (K2, M1) x 3 times ......................................................................(9)
3. 8 . Knit all
9. (K1, K2tog) x 3 times .................................................................(6)
Transfer the 6 stitches in a tapestry needle and sew

Legs (Make 2)
with Blue Yarn
At the bottom, pick up 10 stitches (5 above and 5 below to me a circle)
1. Knit all
2. K3, M1, K5, M1, K2...................................................................(12)
3. (K2, M1) x 6 times........................................................................(18)
4. (K3, M1) x 6 times........................................................................(24)
5. (K4, M1) x 6 times........................................................................(30)
6. to 7. Knit all
8.  (K3, k2tog) x 6 times ...................................................................(24)
9.  (K2, k2tog) x 6 times ...................................................................(18)
10. (K1, k2tog) x 6 times ...................................................................(12)
11. K2tog x 6 times ............................................................................(6)
Transfer the 6 stitches in a tapestry needle and sew the end and also sew the leg and the body together on the upper side to that the teddy can sit properly

Ears (Make 2)
With yellow yarn
on the top of the head, pick 6 stitches (3 above and 3 below to form a circle) in such a way that it falls on the side
1. Knit all ............................................................................................(6)
2. (K3, M1) x 2 times .........................................................................(8)
3. (K4, M1) x 2 times .........................................................................(10)
4. Knit all
5. (K5, M1) x 2 times .........................................................................(12)
6. Knit all
7. (K6, M1) x 2 times .........................................................................(14)
6. to 9 Knit all
10. (K5, k2tog) x 2 times ......................................................................(12)
11. Knit all
12. (K4, K2tog) x 2 times .....................................................................(10)
13. Knit all
14. (K3, K2tog) x 2 times .....................................................................(8)
15. Knit all
16. (K2, K2tog) x 2 times .....................................................................(6)
17. Knit all
18. (K1 K2tog) x 2 times .....................................................................(4)
Transfer the 6 stitches in a tapestry needle and sew

Tail (Make 1)
With blue yarn
at the back botthom, pick 6 stitches (3 above and 3 below to make a circle)
1. Knit all .......................................................................................(6)
2. (K1, M1) x 6 times ....................................................................(12)
3. (K2, M1) x 6 times ....................................................................(18)
4. Knit all
5. (K1, K2tog) x 6 times ................................................................(12)
6. K2tog x 6 times ..........................................................................(6)
Transfer the 6 stitches in a tapestry needle and sew the ends and sew around a little fit to give a firm tail as this will support the bunny while sitting


Friday, March 25, 2016

Free Pattern Garter Stitch Baby Booties

A simple easy to knit Garter stitch Booties.
Depending on the size of needle, using the same yarn, I knitted 2 booties of different size

With 3mm needle + fingering yarn, the booties fits 1 month - 4 month
With 4mm needle + fingering yarn, the booties fits for one year and above

Pattern :
1. - Cast on 35
2. - K1, YO, K16, YO, K, YO, K16, YO, K1 (39)
3. - Knit all stitch (when you reach the YO stitch, knit from back loop as we do not want to create a hole at this place, rather wants to increase 1 stitch. If you are not familiar of increasing the stitch this way, use M1 instead of YO in Row 2 above. However my pattern will give you a more beautiful garter stitch)
4. - K1, YO, K17, YO, K3, YO, K17, YO, K1 -----------(43)
5. - Knit all stitch (knit from back loop for the YO stitch from Row 4)
6. - K1, YO, K18, YO, K5, YO, K18, YO, K1------------- (47)
7. - Knit all stitch (knit from back loop for the YO stitch from Row 4)
8. - K1, YO, K19, YO, K7, YO, K19, YO, K1 ------------(51)
9. - Knit all stitch (knit from back loop for the YO stitch from Row 4)
10. - Knit all
11. - Knit all
12. - Knit all 
13. - Knit all
14. - Knit all
15. - Knit all
16. - Knit all
17. - Knit all
18. - K19,{ K2tog tbl x 3 times}, K1, {K2tog x 3 times},K19 -----------------(45)
19. - Knit all
20. - K16, { K2tog tbl x 3 times}, K1, {K2tog x 3 times}, K16 ---------------------- (39)
21. - Knit all
22. - K15, { K2tog tbl x 2 times}, K1, {K2tog x 2 times}, K15-------------- (35)
23. - Knit all
24. - K13, { K2tog tbl x 2 times}, K1, {K2tog x 2 times} K13 ---------------------- (31)
25. - Knit all and Knit the next 10 Rows
BO


Friday, February 19, 2016

Split-toe Socks

Knitting- knit, knitted socks, socks, Padi socks, split-toe socks, Japanese socks, knitting pattern, free knitting pattern for socks
I thought I will never learn to do a split-toe socks but I managed to made the first pair and wrote the pattern simultaneously

He is the finish product


Pattern :

For the Cuff :
- Cast on 40 stitch on a circular needle

- long tail cast on
- pull out one side 
- divide the stitch into 2 equally
- bring it forward to knit
- pull the side with the working yarn

- 2 rounds of black yarn (K2P2 rib)
- K2(white yarn), P2(black yarn)
- 2 rounds of black yarn(K2P2 rib)
- K2(white yarn), P2(black yarn)
- 2 rounds of black yarn(K2P2 rib)
- 2 rounds of white yarn(K2P2 rib)
- K2(white yarn), P2(black yarn)
- 2 rounds of black yarn(K2P2 rib)
- K2(white yarn), P2(black yarn)
- 4 rounds of black yarn(K2P2 rib)

- Knit all (white yarn)


For the Heal Flap:
We have to knit on the 20 stitches (on one side )
<!--[if !supportLists]
-          - 1. Slip 1, Knit 1
-         -  2. Purl 
      - Repeat step 1 and 2, 11 times
-     - Slip 1, Knit 1
    For the Heal turning:
    - we continue working on the same piece (heal flap)
    - Step 1. - Purl 12, P2tog, P1, turn
    - Step 2. - Slip 1, K5, SSK, K1, turn
    - Repeat step 1 and 2 till only 12 stitch are left ( remember we reduce te stitches to 12 from 20 at this point)

    For the Gusset:
   - With the same needle where we have the 12 stitches, we pick up 13 stitches on the side as in the image below - Now we will have 25 stitch on this needle (12+13 =25)

     Now we have to knit the side which we left (the other side) when we started the heal flap
             - Knit 20 and then pick up 13 stitches. So, on the other side we have 33 stitches

    * But now to have to divide the stitches equally on both side and place marker at the area where we have to do the decreasing (refer the image below)
           * Now you should have 29 stitches on each side


  Step 1.  - K16, K2tog, K, Marker, K10, Marker, SSK, K17
               - Knit All


  Step 2.  - K15, K2tog, K, Marker, K10, Marker, SSK, K16
               - Knit All

SStep 3.  - K14, K2tog, K, Marker, K10, Marker, SSK, K15
               - Knit All
 
SStep 4.  - K13, K2tog, K, Marker, K10, Marker, SSK, K14
               - Knit All


SStep 5.  - K12, K2tog, K, Marker, K10, Marker, SSK, K13
               - Knit All

  Change to black color yarn

SStep 6.  - K11, K2tog, K, Marker, K10, Marker, SSK, K12
               - Knit All

SStep 7.  - K10, K2tog, K, Marker, K10, Marker, SSK, K11
               - Knit All

   Change to White and start knitting for the foot (Here keep knitting the round till you get your desired length)


     For my  socks, I did the following round
     - 1 round of white, all knit
     - 4 rounds of light blue, all knit
     - 5 rounds of white, all knit
     - 3 rounds of yellow, all knit
     - 1 round of mix (1 yellow, 1 dark green)
-    - 3 rounds of yellow, all knit
     - 1 round of mix (1 yellow, 1 dark green)
-    - 3 rounds of yellow, all knit
     - 1 round of mix (1 yellow, 1 dark green)
-    - 3 rounds of yellow, all knit 
    - 5 rounds of white, all knit
    - 6 rounds of pink, all knit
     - 4 rounds of white, all knit


   At this stage we will have 44 stitch on our needle

   For the left Toe :

    - To make it clear for my viewer, I have shot the below image of the sock from the top as if to wear (this view help us understand where we want to have the big toe for left or for right)


   We will start knitting where we have our marker now in the circle area in the above image for the big toe
     - Step 1 : - Knit 8, cast on 4 by using back loop method, K8 - We will have 20 stitches now for the big toe. Here I am using DPN instead of circular needle (the remaining stitches, held in a wasted yarn)

     - Continue knitting till the length is a little shorter than your toe. In my case I did 14 rounds of Step 1
   Then we will have start decreasing to close the toe
     - K3, K2tog all round
     - K2, K2tog all round
     - K, K2tog all round
     - K2tog all round and finish with needle

   For the left remaining toes : 
    We have to now work on the stitch which was held in the wasted yarn while we were doing the big toe
     - Knit 28 stitches and then pick up 4 next to the big toe to close the gap = 32 stitches
     - Knit 3 rounds - all knit

    We will have decreasing at the place where we have this 2nd marker which is circle in green in the above image
    - from the first marker, we will count
     - K13, K2tog, K, Marker, K, SSK, K13
     - Knit all
     - K12, K2tog, K, Marker, K, SSK, K12
     - Knit all
     - K11, K2tog, K, Marker, K, SSK, K11
     - Knit all
     - K10, K2tog, K, Marker, K, SSK, K10
     - Knit all
      - K9, K2tog, K, Marker, K, SSK, K9
     - Knit all

    Close it with Kitchener stitch :)
 
Refer the image above for the right toe and follow the pattern similarly as of Left Toe


-->

Thursday, February 18, 2016

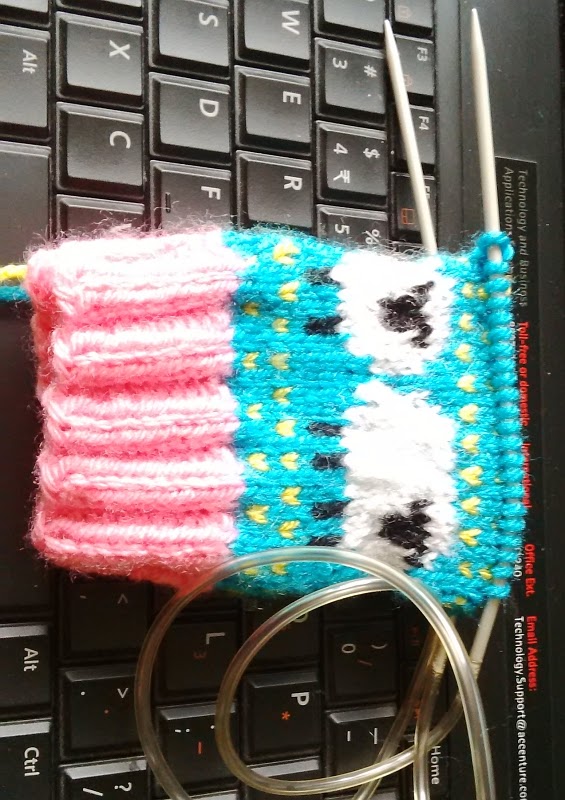
Trying out a sock with inspiration from Donna Smith's design

Knitting- knit, knitting, Ravelry pattern, Baa-ble Hat pattern, Free Pattern, Knitting pattern


The Baa-ble Hat pattern in Ravelry fro Donna Smith is a heart winner, http://www.ravelry.com/patterns/library/baa-ble-hat, I wanted to try the pattern but didn't want to make a hat. Do, I am trying out knitting a sock now

Needle : 11
Yarn : 4 ply, 100 % acrylic

Cast on 44 -I usually cast on 40 but for the pattern, I had to increase 4 but looks ok so far

- K2P2 rib for 10 rounds in pink and then I made the pattern below for this sock

- then I knit according to the pattern above

- I am not a pro at using multiple colors and doing this pattern in the circular needle was driving me crazy. So, I switch the stitches in 4 needles

- its totally worth it so far
- I am loving it, I will post images as I go through